Imagine you’re chilling on your couch and scrolling through crypto Twitter, when you suddenly see a tweet from your exchange saying it's been hacked. As you start dripping with cold sweat, you panic and frantically try to access your account only to find all your assets gone. For any crypto trader, there’s no bigger nightmare.
Relax, breathe! Your cryptocurrencies are probably still safe, but it may be time for you to rethink where you store your coins. Should you trust your exchange, no matter how big they are, with your life savings? Think it won’t happen to you? Think again — hackers stole nearly $3.8 billion in 2020 alone.
So what can you really do? The answer is simple — get a cryptocurrency wallet. Typically, Metamask is the go-to software wallet for users due to its relatively easy onboarding process (in the crypto space anyways!). However, it still doesn’t guarantee your funds are safe! For instance, did you know about the $500,000 stolen in the crypto fishing scam last year from software wallets such as MetaMask?
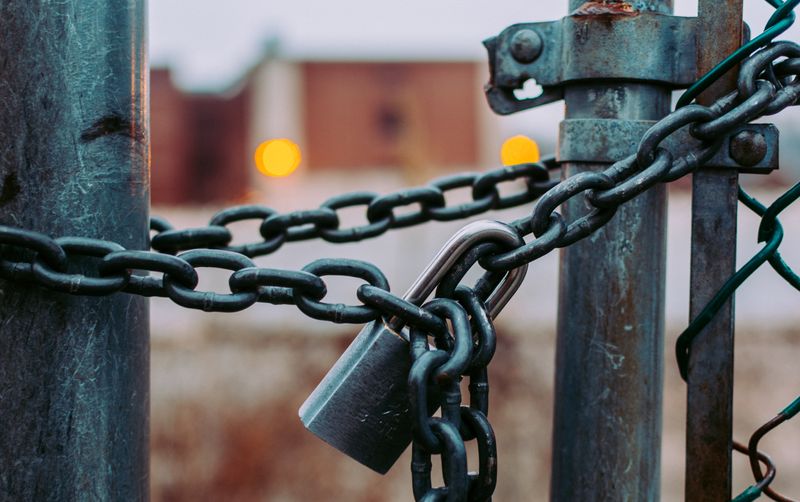
If security is your main concern or if you’re a big whale, a hardware wallet is your best bet to safeguard your assets. Let’s first understand how a hardware wallet works.
Hardware wallets — think bank locker keys
Unlike your physical wallet, which carries your cards and cash, a hardware wallet doesn’t actually store your cryptocurrencies.
A hardware wallet is a secure storage device that stores the private key (a string of letters and numbers that acts as your password) to your blockchain address. Your cryptocurrencies are stored in the blockchain address that can only be accessed with the private key.
Think of the hardware wallet like a bank locker or safety deposit box key — your blockchain address is the deposit box that stores the crypto. When you open a safety deposit box, you receive one key while the other stays with the bank. Your hardware wallet acts as a key to your blockchain address where your digital assets are stored, acting similar to the key you receive for your safety deposit box.
Good hardware wallets are built in a way that does not allow the private key to be removed from the device, making them more secure. There are a number of hardware wallets available, with Trezor and Ledger Nano being among the most popular ones.
Do you really want a hardware wallet?
It may seem like a daunting task to get a hardware wallet, but the time (and money) investment has good returns. Hardware wallets allow you to take charge of your digital assets, essentially allowing you to be your own bank rather than trusting a third-party like an exchange.
Think of it this way — wouldn’t you sleep better if you knew no one could access your funds except you?
Software wallets may be easier to use because they can be accessed directly from your phone or desktop. But because these devices are connected to the internet, it puts your wallet at significant risk from malware and other digital attacks.
That’s why hardware wallets are more secure. They are always offline and away from the prying eyes of hackers and other criminals. In fact, hardware wallets are considered to be the most secure type of wallet after paper wallets, which are now considered obsolete.
Besides, you can use one hardware wallet to access multiple cryptocurrencies across blockchains. Handy.
How does a hardware wallet work?
Hardware wallets perform two main functions. Firstly, they securely store your private key to your wallet address. Secondly, they help sign and confirm transactions on the blockchain in a hacker-resistant way.
Let’s say you want to send Bitcoins from your hardware wallet to your exchange wallet. After you input all the details, you would have to review and approve the transaction on your hardware wallet device.
When you confirm the transaction, the hardware wallet device provides your signature, which proves ownership of your private key — this is like you signing a check to authorize a transaction. Then, the transaction is broadcast to the blockchain network for confirmation. This is mandatory for every interaction with a hardware wallet, adding an extra layer of security.
How to use a hardware wallet
The process of setting up a hardware wallet can differ slightly based on the manufacturer. But they have the same few steps to set up your wallet, like choosing a PIN and a recovery phrase. Let’s take Trezor as an example.
How to set up a Trezor wallet
It’s a good practice to purchase your Trezor wallet either directly from Trezor or an authorized distributor since crypto criminals often try to alter devices and send them to potential victims. Once you receive your shiny new Trezor wallet, take a minute to make sure the box is sealed. Then, when you are ready to set it up, simply follow these steps:
- Plug in your Trezor wallet to your computer. Once plugged in, your device will prompt you to visit the Trezor website to begin the setup.
- Either download Trezor suite or access it on the web at https://suite.trezor.io/web/
- Once you’ve gone through the initial information about Trezor on the first page, you’ll be prompted to install firmware on your new device.. Select Install firmware to proceed.
- Your device may prompt you to confirm the firmware fingerprints, a series of numbers and letters, with the one you see on your computer.
- Once you confirm, the firmware will be installed and you will see a message on your computer to reconnect your device.
- Once you reconnect, you will have two options: create a new wallet or recover an existing one. When you click on create a new wallet, Trezor will create a wallet address for you with a public and private key.
- Next, you’ll be asked to create a backup. When you click on ‘create backup’, you’ll be prompted to note down your recovery phrase. The recovery phrase will contain a series of words, usually 12, 18 or 24, that will be prompted on your device and can be used to recover access to your blockchain address if you end up losing your Trezor device.
The concept is similar to the recovery question you are asked to answer when setting up a password for the first time. The idea is that you’ll still be able to access your account even if you lose your password — or in this case, your hardware wallet.
Make sure you write down all the words and do not lose them. Do not make digital copies of it to keep your device completely secure.
- Next, you’ll be asked to set up your Trezor PIN. Enter your new PIN by clicking on the obscured numeric pad displayed in the browser, which can be unlocked by cross referencing your Trezor device. Once done, press Enter.
- Re-enter your PIN, login, and name your device. You are all set to use your new hardware wallet!
So now that you know how to set up a hardware wallet, let’s figure out how you can use it to store and transfer your cryptocurrencies.
How to operate a Trezor wallet
Let’s say you want to send a few Bitcoins from your exchange wallet to your new Trezor wallet. First, you have to go to the ‘receive’ tab in your Trezor Bitcoin wallet and copy the public address. You can also click on ‘Show new address’ if you would like to use a different public address for the transaction. Traders often prefer using separate public addresses for security reasons.
Paste the address in your exchange wallet and send the desired number of Bitcoins. In your Trezor Bitcoin wallet, you will now be able to see the transaction, although it may be unconfirmed since it takes several minutes for transactions to get confirmed on the Bitcoin blockchain.
Similarly, when you want to send Bitcoins from your Trezor wallet, simply select the ‘send’ tab, paste the address you want to send the tokens to and the amount and click on ‘send.’ The transaction will prompt for confirmation on your Trezor device. Once you confirm, you’ll be able to see the transaction on your Trezor wallet, pending confirmation.
Although the interface might differ, the steps to send and receive tokens on your hardware wallets will be similar.
What’s the catch with hardware wallets?
So, why doesn’t everyone use hardware wallets already? It’s because when you have a hardware wallet, you are solely responsible for its safekeeping. You may want to keep them close to execute transactions frequently, but what happens if it gets stolen or you lose it?
Most hardware wallets now come with a PIN required to unlock it, which means even if someone got hold of your device, they might need time to access your funds — enough time for you to move them to safety.
But what happens if you don’t use your device for a while and then forget the PIN yourself? You wouldn’t be the first. Some have locked themselves out of millions. The recovery seed phrase might help, but if you lose that too, you lose access to your cryptocurrencies for good.
Additionally, hardware wallets can cost anywhere between $50 and $500. Even though it’s a one-time investment for security (unless you want multiple hardware wallets to distribute your fund), this can be a deterrent for some.
Are hardware wallets worth it?
Hardware wallets give you control over your tokens and are the most secure way to store private keys and confirm transactions. But they come with kinks — you could easily lose them or forget their PIN codes.
Ultimately, it’s up to you to decide whether you want control over your assets and the responsibility that comes with it. With great power (security in this case) comes great responsibility!
Lipsa Das is the founder of Spiritwish, and you can find her on Twitter, LinkedIn, and Instagram.
Of course, don't forget to subscribe to the weekly Hedgehog newsletter!